- Tile tutorial
- 5179 views
- 0 comments

Do you want to lay tiles? Or know the right tools for laying tiling on the floor? Action Bricolage, specialist in tiler equipment and tools, guides you step by step through this book!
How to lay tiles?
Laying tiles requires a certain know-how. However, this task can be accessible to everyone provided you follow a few rules and have the right tools. Once you have chosen your tiling and made your plan (also called layout), all that remains is to proceed with the installation! Note that the plan you have made should allow you to know how many m2 of tiles you will need.
The tools necessary for laying tiles
You must therefore equip yourself with the appropriate tools. Here is a list of the necessary tools:
- a pair of knee pads,
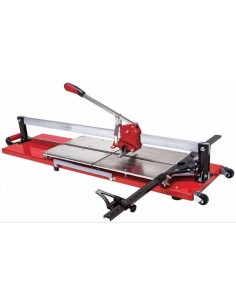
- a tile, manual or electric according to your needs, (see article choose your tile)
- a toothed glue comb, a trowel,
- adhesive mortar,
- jointing mortar,
- a trough for mixing,
- braces, in order to obtain a regular space between the tiles (note that there are leveling CLIPS systems that allow you to align your tiles and level them effortlessly,
- a level,
- a rubber mallet,
- a metal ruler to check that the surface is flat,
- one meter,
- a suction cup if you have large tiles,
- a tiler sponge (or cleaning kit),
- a raclette
Prerequisites for laying tiling
Before proceeding with the installation of the tiles, make sure that the substrate has been properly prepared. It must be dry, clean and dust free. So feel free to scrape, clean and vacuum before you start. Your plan or layout has allowed you to know the number of m2 you will need, the cuts you will have to make and the starting point.
Laying tiling step by step
Prepare your glue according to the instructions on the bag. Use the trowel to deposit the glue on the support. Apply an even and even thickness using the glue comb. You must not leave any empty space to prevent a tile from breaking later.
The teeth of the glue comb serve precisely to guarantee an even distribution of the glue. Alternate the application of glue and the laying of tiles m2 by m2. Note, if your tiles are longer than 12 inches, also apply glue to them with your comb.
Then tap your tile with the mallet to make it adhere to the glue and level it while checking regularly with the metal slat and the spirit level that your surface is flat.
Use braces to leave an even space between the tiles.
For more precision, there are CLIPS leveling systems that allow you to perfectly align and level the ground. All you have to do is repeat the same gestures until the cuts. The glue must dry 24 hours before you can walk on the tiles. So take care not to block yourself. For the cuts, if they are straight or diagonal, you just need to trace them and cut them using your Carrelette. For slightly more complicated cuts, there are contour gauges to precisely trace the cut to be made.
You can use multiple pliers to cut, trim or nibble the tiles as needed, or use a grinder. Once the glue has dried, 24 hours after installation, it is time to move on to the joints. To do this, prepare your joint mortar in the trough following the instructions. Spread some on your tiled surface, and using the squeegee, fill all the spaces dedicated to the joints. Remove the excess by running the squeegee diagonally to the joints so as not to remove the mortar from the joints. Clean your surface with a sponge. Action DIY offers you all the tools you need for tiling online in the tiling tool section.
Related products


Comments (0)